A cracked wall clock face glass can be disheartening, turning a functional timepiece into an eyesore. Many cherished wall clocks, whether a family heirloom or a stylish decor piece, often suffer from accidental impacts or age-related vulnerabilities, leading to unsightly fractures. While a cracked glass might seem like a dire situation, you don’t always need to discard your beloved clock or incur expensive professional repairs. With the right approach, many cracked clock face glasses can be mended or replaced with a do-it-yourself (DIY) approach, restoring both its function and aesthetic appeal. This comprehensive guide will walk you through the process, helping you determine whether to repair or replace, gather the necessary tools, and execute the steps to bring your wall clock back to life.
Understanding Your Clock’s Face Glass and Assessing Damage
|
Our Picks for the Best Wall clock in 2026
As an Amazon Associate I earn from qualifying purchases.
|
||
| Num | Product | Action |
|---|---|---|
| 1 | AKCISOT Wall Clock 10 Inch Silent Wall Clocks Battery Operated Non Ticking - Modern Silver Clock Decorative for Kitchen, Bathroom, Bedroom, Living Room, Office, Home(Silver) |

|
| 2 | AKCISOT Atomic 10 Inch Wall Clock Analog Clocks for Indoor Kitchen, Battery Operated Clock for Bedroom Office Classroom Living Room(Silver) |
|
| 3 | WallarGe 14.5'' Large Digital Wall Clock Battery Operated with Jumbo Numbers, Temperature and Date - Easy to Read and Set, Auto DST |
|
| 4 | AKCISOT Atomic 10 Inch Wall Clock Analog Clocks for Indoor Kitchen, Battery Operated Clock for Bedroom Office Classroom Living Room(Black) |
|
| 5 | AKCISOT Wall Clock,Boho Kitchen 10 Inch Wall Clocks Battery Operated Non Ticking,Silent Modern Clock Decorative for Bedroom,Office,Bathroom,Living Room,Home (Wood Grain) |
|
| 6 | AKCISOT Wall Clock, Modern Small Wall Clocks Battery Operated 8 Inch, Silent Non-Ticking Analog Classic for Office, Home, Bathroom, Kitchen, Bedroom, School(Black) |
|
| 7 | AKCISOT Wall Clock 10 Inch Silent Non-Ticking Modern Clocks Battery Operated - Analog Small Classic for Office, Home, Bathroom, Kitchen, Bedroom, School, Living Room(Black) |
|
| 8 | AKCISOT Wall Clock, Modern Small Wall Clocks Battery Operated 8 Inch, Silent Non-Ticking Analog Classic for Office, Home, Bathroom, Kitchen, Bedroom, School(White) |
|
| 9 | AKCISOT Wall Clock, Modern Small Wall Clocks Battery Operated 8 Inch, Silent Non-Ticking Analog Classic for Office, Home, Bathroom, Kitchen, Bedroom, School(Silver) |
|
| 10 | HIIXHC Wall Clock, Modern Digital Wall Clocks Battery Operated 10 Inch, Silent Non-Ticking Kitchen Clock, Small Classic Analog Clock Decorative for Living Room Decor, Bedroom,Office, Classroom |
|
Before diving into repairs, it’s crucial to understand the type of glass your clock features and accurately assess the damage. Clock face glass comes in various forms, including flat, convex (domed), and sometimes beveled or curved designs, particularly in antique models. The material could be standard glass, acrylic (plexiglass), or even specialized mineral glass. Hairline cracks are superficial breaks that don’t compromise the structural integrity significantly, while deeper cracks or shattered glass present a more complex challenge.
It’s vital to determine if a DIY repair is feasible. Small, isolated hairline cracks are often good candidates for repair using adhesives. However, if the glass is extensively shattered, has large spiderweb cracks, or if pieces are missing, a full replacement is generally the safer and more effective solution. Curved or beveled glass is considerably more challenging to repair or replace yourself and might warrant professional attention. Always prioritize safety; if the glass is unstable and shards are a risk, handle it with extreme caution, wearing appropriate protective gear.
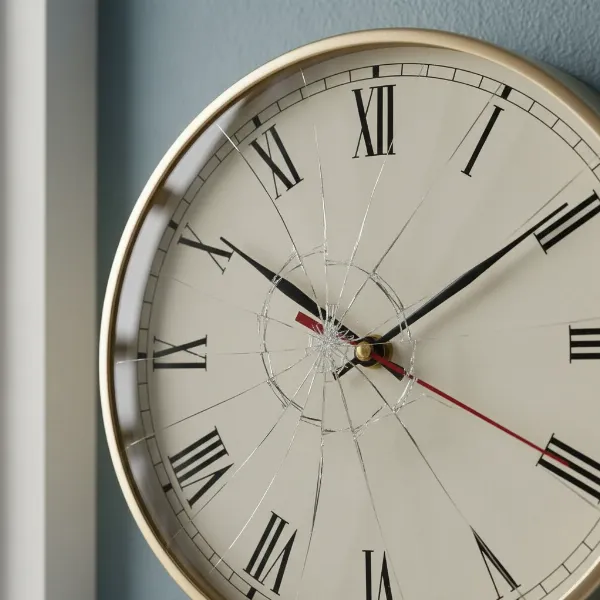 Close-up of a wall clock face with a visible crack, indicating damage assessment.
Essential Tools and Materials for DIY Clock Glass Repair
Successfully repairing or replacing your clock’s face glass begins with gathering the right tools and materials. Having everything ready beforehand will streamline the process and ensure a safer, more efficient repair.
For Repairing Minor Cracks:
- Safety Gear: Nitrile gloves and safety glasses are non-negotiable to protect your hands and eyes from glass shards and chemical irritants.
- Cleaning Supplies: Glass cleaner and paper towels for thorough preparation.
- Adhesives: A high-quality two-part epoxy for glass is ideal for strong, clear bonds. Look for a double-cylinder syringe to ensure proper mixing ratios. Alternatively, UV curing glue can be effective for hairline cracks. For temporary fixes, clear nail polish or super glue can prevent cracks from spreading.
- Application Tools: Wooden craft sticks or toothpicks for mixing and applying adhesives.
- Finishing Tools: A razor blade or utility knife blade to carefully slice off excess cured epoxy. Ultra-fine sandpaper (800 to 1000-grit diamond sandpaper) for smoothing, and cerium oxide glass polisher (or even toothpaste/baking soda) to restore shine.
- Other: Painter’s tape for securing pieces during curing, and cardboard as a disposable work surface.
For Replacing Glass:
- Basic Disassembly Tools: Screwdrivers (various sizes, including small Phillips for delicate clock mechanisms) to remove the clock frame and hands.
- Measuring Tools: A ruler or caliper to precisely measure the diameter and thickness of the old glass or the opening.
- Replacement Material:
- Flat Glass: Can be cut to size by a local glass shop or purchased online.
- Acrylic/Plexiglass: An excellent, safer alternative to glass, especially for DIY. It’s lighter, shatter-resistant, and can be cut at home with a scroll saw.
- Specialty Glass: For convex, beveled, or custom-shaped glass, you may need to source from clock parts suppliers or specialty glass manufacturers.
- Mounting Supplies: Depending on your clock, this could include small clips, screws, or a suitable adhesive (e.g., clear silicone sealant) if the original was glued.
Step-by-Step Guide: Repairing Minor Cracks in Wall Clock Glass
For hairline cracks or small chips that haven’t compromised the glass’s structure, a careful repair can significantly improve its appearance and prevent further damage.
- Prepare Your Workspace and Clock: Lay down clean cardboard in a well-ventilated area. Carefully remove the clock from the wall and, if possible, gently remove the glass face from its frame. This often involves unscrewing the back panel or prying open a bezel. If the glass cannot be removed, you’ll need to work on the clock itself. Always wear safety glasses and gloves.
- Clean the Glass Thoroughly: The crack and surrounding area must be spotless for the adhesive to bond effectively. Use a glass cleaner and paper towels to remove all dust, dirt, and fingerprints. If separating the glass pieces is an option, clean the broken edges as well. Allow the glass to dry completely.
- Prepare the Epoxy: If using two-part epoxy, cut or snap off the ends of both cylinders, ensuring both nozzles are equally open. Squeeze an equal amount of resin and hardener onto a disposable surface (like a paper plate) and mix them thoroughly with a wooden craft stick for about 30 seconds to one minute, or according to product instructions. Work quickly, as epoxy typically has a short working time (around 5 minutes).
- Apply the Epoxy to the Crack:
- For separated pieces: Apply a small amount of mixed epoxy along the broken edge of one piece. Carefully align and firmly press the two pieces together. Use painter’s tape to hold them in place while the epoxy cures.
- For intact but cracked glass: Gently force the epoxy directly into the crack using the craft stick, as if spreading butter. Ensure the epoxy fills the entire crack. It’s okay to leave a slight hump of epoxy over the crack, as this excess will be removed later.
- Allow the Epoxy to Cure: Let the epoxy dry and harden completely according to the product’s instructions. This can range from a few minutes to a full day or two. If the pieces were separated, you might need to use lightweight clamps to hold them firmly during this phase.
- Remove Excess Epoxy: Once the epoxy is fully cured and hard, carefully slice off the excess with a clean razor blade or utility knife blade. Hold the blade at a low angle (around 15 degrees) and slide it away from your body, keeping it flush with the glass surface. This technique allows the blade to cleanly remove the hardened excess while leaving the repaired crack filled.
- Clean and Polish (Optional but Recommended): Clean any remaining fingerprints or residue from the glass with glass cleaner. For a smoother finish, you can gently use ultra-fine sandpaper (800-1000 grit) to lightly buff the repaired area, followed by a cerium oxide glass polisher to restore the glass’s natural shine. You can also try a dab of non-gel toothpaste or a baking soda paste for a gentle polish.
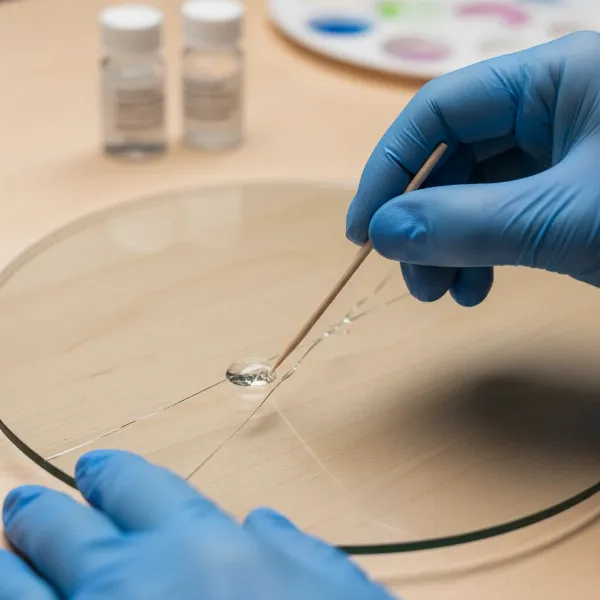 Hands applying epoxy to a hairline crack on a wall clock glass face during repair.
Replacing a Cracked Clock Face Glass: The DIY Alternative
When a crack is too extensive for repair, or the glass is shattered, replacing the clock face glass is often the best course of action. This method also allows for an upgrade to safer materials like acrylic.
- Disassemble Your Clock:
- Carefully remove the clock from the wall.
- Lay it on a clean, soft surface to protect the clock’s body.
- Most wall clocks have a frame that can be opened from the back. Use a screwdriver to remove any screws holding the back panel or bezel. Pay close attention to how components are fitted, perhaps taking photos, as you’ll need to reassemble them later.
- Once the back is open, gently remove the clock mechanism. Carefully pull off the clock hands, often by pinching and pulling them directly off their central posts.
- With the mechanism and hands out, you can carefully lift out the damaged glass. If it’s shattered, use tape over the cracks before removal to help hold pieces together and prevent injury.
- Measure for the New Glass:
- Accurate measurement is crucial. Measure the exact diameter of the opening where the glass sits. If possible, measure the old glass piece before it shattered.
- Note the thickness of the old glass or the depth of the groove it sat in. This is important for a secure fit.
- If your clock had a convex or specially shaped glass, you’ll need to indicate this when ordering a replacement. For DIY, flat glass or easily molded acrylic might be more practical.
- Source Your Replacement Material:
- Flat Glass: A local glass cutting shop can custom-cut a piece of glass to your exact specifications.
- Acrylic/Plexiglass: Available at hardware stores or online, it can often be cut to size at home using a scroll saw or even a utility knife for thinner sheets. This is a durable and safer option.
- Specialty Glass: For antique clocks with convex or uniquely shaped glass, you may need to search specialty clock parts suppliers online or consult with a professional clock restorer.
- Install the New Glass:
- Before installation, thoroughly clean the clock face, the inside of the frame, and the new glass piece to remove any dust or debris.
- Carefully place the new glass into the frame, ensuring it is perfectly aligned and sits snugly.
- If your clock uses clips, screws, or a retaining ring, reattach them to secure the glass. If the original was glued, use a clear-drying silicone sealant, applying it sparingly around the edge of the glass where it meets the frame.
- Reassemble the Clock:
- Place the clock mechanism back into its position.
- Carefully reattach the clock hands, ensuring they are properly aligned and not touching each other or the clock face. It’s often easiest to set the time to 12:00 before reattaching the hands for proper alignment.
- Close and secure the back panel of the clock, reattaching any screws.
- Hang your newly repaired or restored wall clock back in its place and admire your handiwork.
Maintenance Tips to Prevent Future Damage
To ensure the longevity of your clock’s face glass and prevent future cracks, consider these simple maintenance tips:
- Handle with Care: Always handle your wall clock gently, especially when moving or cleaning it.
- Secure Mounting: Ensure your wall clock is securely mounted to a stud or using appropriate wall anchors to prevent accidental falls.
- Avoid Impact: Position your clock in an area where it is less likely to be bumped or hit by moving objects.
- Regular Cleaning: Clean the glass regularly with a soft cloth and a gentle glass cleaner to prevent dust and grime buildup, which can make minor imperfections more noticeable.
- Environmental Factors: While less common for modern wall clocks, extreme temperature fluctuations can stress glass over time. Maintain a stable indoor environment for antique or delicate pieces.
When Professional Help is Best
While many clock face glass issues can be tackled with DIY methods, there are instances where professional intervention is advisable. If your clock is a valuable antique or a family heirloom with intricate or rare glass (like hand-blown, beveled, or custom-curved pieces), a professional clock restorer or a specialized glass artisan possesses the expertise and tools to handle such delicate work without compromising the clock’s value or integrity. They can often create custom-bent glass pieces or seamlessly repair complex cracks in a way that DIY methods cannot. The aim of DIY repair is often to minimize the appearance of a crack, but it may not make it completely invisible. For truly invisible repairs or for types of glass that are difficult to work with, a professional is your best option.
Buying Guide: Choosing a Replacement Wall Clock Glass
When replacing your clock’s face glass, selecting the right material and ensuring correct measurements are paramount.
- Material:
- Standard Glass: Clear and offers excellent visibility. Can be heavy and is prone to shattering.
- Acrylic (Plexiglass): Lightweight, shatter-resistant, and a safer alternative, especially in homes with children or pets. It can scratch more easily than glass, but often comes with scratch-resistant coatings.
- Anti-Reflective Glass: Reduces glare, improving readability.
- Shape and Type:
- Flat: Most common and easiest to replace.
- Convex (Domed): Often found on older or decorative clocks. Requires specialized cutting or sourcing.
- Beveled: Features decorative angled edges, typically on antique clocks, requiring custom work.
- Measurements: Always measure the exact inner diameter of the clock bezel or the existing glass. Take multiple measurements to ensure accuracy. Note the thickness to ensure it fits the frame’s groove.
“Measure twice, cut once” is a timeless adage, particularly true when dealing with clock glass. Precise measurements will save you time, money, and frustration.
Conclusion
A cracked wall clock face glass doesn’t have to signal the end for your cherished timepiece. Whether you opt for a meticulous repair of a minor crack or a complete replacement of a shattered pane, the satisfaction of restoring your wall clock yourself is immense. By understanding the nature of the damage, assembling the right tools, and following these detailed steps, you can confidently undertake this DIY project, enhancing your home’s decor and preserving a piece of functional art. Remember that while many repairs are within reach of the enthusiastic DIYer, knowing when to consult a professional can protect valuable or intricate clocks.
What kind of unique story will your newly restored wall clock tell in your home?