So, you’ve found it. The perfect wall clock. It’s not just a timepiece; it’s a statement, the final brushstroke on the canvas of your room. You hold it up against the wall, step back, and admire it. Perfect. But then, a familiar, sinking feeling kicks in as you rap your knuckles against the wall. It’s not the hollow, obliging thud of drywall. It’s the dense, unforgiving, and slightly intimidating sound of plaster. Suddenly, your design dream feels like it’s on shaky ground. If you’re wondering how to secure a wall clock on a plaster wall without it all ending in tears and a pile of dust, you’ve come to the right place.
Here at Wallclockus, we believe a clock is the silent heartbeat of a home, and getting it on the wall shouldn’t be a source of stress. Plaster walls, common in older homes, have a certain charm but can be notoriously crumbly and unpredictable. Unlike drywall, you can’t just pop in a plastic anchor and call it a day. But don’t you worry. With a little know-how and the right tools, you can mount your clock securely, ensuring it ticks away beautifully for years to come. Let’s walk through this together.
First, Why Are Plaster Walls So Tricky?
Before we dive into the “how,” it helps to understand the “why.” What makes plaster so different?
Most plaster walls, especially in pre-1950s homes, consist of two layers: a base of wooden strips called lath, and one or more coats of plaster slathered on top. This creates a thick, hard, and often uneven surface. The problem? The plaster itself is brittle. Driving a simple nail or screw into it can cause it to crack, crumble, or “blow out” a chunk from the back, leaving you with a weak hold and a messy hole. The secret to success lies in bypassing the plaster’s weakness and anchoring into something solid, like the wooden lath behind it or the wall studs.
A Note from the Curator: I once tried to hang a heavy, vintage station clock in my first apartment, a lovely old place with plaster walls. I used a nail, said a prayer, and watched in horror as a saucer-sized piece of plaster popped off the wall. It was a lesson learned the hard way, and it’s why I’m so passionate about getting this right!
Your Toolkit: Gathering the Essentials
Having the right tools on hand makes all the difference. You won’t need a full workshop, just a few key items to make the job clean and secure.
- A good stud finder: An electronic stud finder is your best friend here. It will help you locate the wooden studs behind the plaster and lath.
- A drill with various bit sizes: You’ll need this for creating a pilot hole.
- The right hardware: This is the most crucial part. Depending on your clock’s weight and where you’re mounting it, you’ll need one of the following:
- For light clocks (under 5 lbs): A simple picture hanger with a hardened nail can sometimes work if tapped in gently, preferably into the lath.
- For medium clocks (5-15 lbs): A long screw (at least 1.5 inches) is ideal if you can hit a stud. If not, a toggle bolt or a molly bolt is your go-to anchor.
- For heavy clocks (15+ lbs): Do not hang a heavy clock without anchoring it to a stud or using a heavy-duty toggle bolt. Safety first!
- Tape measure and pencil: For perfect placement.
- Painter’s tape: A little trick of the trade to prevent the plaster from cracking when you drill.
- Level: To ensure your masterpiece isn’t hanging askew.
The Step-by-Step Guide on How to Secure a Wall Clock on a Plaster Wall
Ready to get that clock on the wall? Let’s break it down into simple, manageable steps.
Step 1: Pick Your Spot and Weigh Your Clock
First, decide exactly where you want your clock to hang. Use your pencil to make a small, light mark. Next, determine the weight of your clock. This is non-negotiable, as it dictates your entire mounting strategy. A kitchen scale works perfectly for this.
Step 2: Hunt for a Stud
Turn on your stud finder and slowly slide it horizontally across the wall over your marked spot. When it beeps or lights up, you’ve found a stud. Mark the edges of the stud so you can find the center.
- If you found a stud: Congratulations! This is the easiest and most secure method. You can proceed to Step 3A.
- If you didn’t find a stud exactly where you want to hang the clock: No problem at all. This is very common. We’ll use a wall anchor. Proceed to Step 3B.
Step 3A: Drilling into a Stud (The Gold Standard)
- Place a small piece of painter’s tape over your mark. This simple trick provides surface tension and helps prevent the plaster from chipping as you drill.
- Choose a drill bit that is slightly smaller in diameter than the screw you’ll be using.
- Drill a pilot hole through the tape, plaster, lath, and into the stud. You’ll feel a satisfying resistance as the bit bites into the solid wood.
- Remove the tape.
- Drive your screw into the pilot hole, leaving it sticking out just enough to hang your clock securely.
Step 3B: Using a Wall Anchor (The No-Stud Solution)
This is where we get clever. We’re not relying on the plaster; we’re using an anchor that will brace itself against the back of the wall. A toggle bolt is an excellent choice for this.
- Place painter’s tape over your mark.
- A toggle bolt has two parts: the bolt itself and the spring-loaded “wings.” You’ll need to drill a hole large enough for the folded wings to pass through. The packaging will tell you what size drill bit to use.
- Drill your hole. Go slow and steady.
- Pinch the wings of the toggle bolt flat and push them through the hole. You’ll hear a ‘snap’ as they open up on the other side of the wall. This is the magic moment!
- Pull back on the bolt to ensure the wings are braced firmly against the inside of the wall, then tighten the bolt, leaving it out just enough to hang your clock.
A Clock Is More Than Just Time
Now that the technical part is handled, let’s take a step back. The process of how to secure a wall clock on a plaster wall is about more than just a screw and an anchor. It’s about giving a piece of art the stable, respectful home it deserves. Every clock, from a sleek minimalist modern clock to a grand traditional timepiece, has a personality. Your job as the curator of your own home is to let that personality shine.
What Kind of Wall Clock Are You Hanging?
Understanding your clock’s mechanism can be as fascinating as its design. It also helps you appreciate the weight and balance you just accounted for.
| Feature | Quartz Clock | Mechanical Clock |
|---|---|---|
| Power Source | Battery-operated | Wound by a key (spring-driven) |
| Movement | A quartz crystal vibrates at a precise frequency, creating a stepping motion for the second hand. tick-tick-tick | A complex system of gears and springs. Often has a smooth, sweeping second hand. |
| Maintenance | Change the battery every year or two. | Requires periodic winding (daily, weekly, etc.) and professional servicing every 5-10 years. |
| Accuracy | Extremely accurate. | Can lose or gain a few seconds per day. |
| Typical Weight | Generally lighter. | Often heavier due to the metal components and robust casing. |
Choosing the Perfect Spot: An Art and a Science
Where you hang your clock is just as important as how you hang it. It’s about creating a focal point and enhancing the flow of your space.
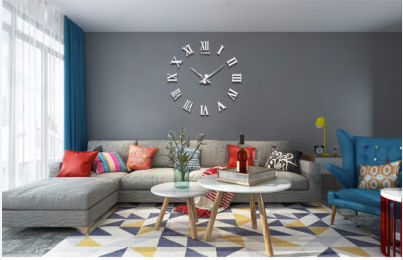
- In the Living Room: Hang it above a mantelpiece, a sofa, or on a large, empty “gallery” wall. It should be at eye level, which is typically around 57-60 inches from the floor to the center of the clock.
- In the Kitchen: An oversized clock can make a fantastic statement in a kitchen or dining area. Ensure it’s not too close to sources of high heat or steam.
- In the Bedroom: A clock with a silent, sweeping movement is a great choice to avoid the incessant ticking that might disrupt sleep. A smaller, more subtle design often works best.
As renowned interior designer Isabella Rossi often says:
“A wall clock is functional jewelry for a room. Don’t hide it. Let it be the conversation starter, the piece that pulls everything together. The wall is your canvas, and the clock is your signature.”
Frequently Asked Questions (FAQ)
Q: Can I just use a nail on a plaster wall?
A: It’s risky. For a very lightweight clock (under 2-3 lbs), a thin, long nail hammered in at a downward angle might hold if it goes into the wooden lath. However, it can easily crack the plaster, and we generally recommend using a proper screw or anchor for a secure, long-lasting hold.
Q: How can I be sure I’m drilling into lath and not just plaster?
A: After you drill through the initial brittle layer of plaster, you should feel the drill bit engage with the softer, more fibrous texture of wood. If you just feel empty space after the plaster, you’re in a gap between lath strips, and you’ll definitely need an anchor.
Q: What’s the best anchor for plaster walls?
A: For most wall clocks, a toggle bolt is the most reliable choice for plaster. The way it expands and braces against the back of the wall provides a very strong and stable anchor point that doesn’t put pressure on the brittle plaster itself.
Q: My plaster crumbled a bit around the drill hole. What should I do?
A: Don’t panic! This is common. If the crumbling is minor, the base of the screw or the clock itself will likely cover it. If it’s a larger chip, you can easily patch it with a small amount of spackling compound after the clock is securely mounted.
Q: How high should I hang my wall clock?
A: The standard rule of thumb for any artwork or focal piece is to hang it so the center is at eye level, roughly 57-60 inches from the floor. Of course, this can be adjusted based on ceiling height and the furniture below it.
The Finishing Touch
You did it. You faced the formidable plaster wall and won. Your clock is now hanging securely, a testament to a job done right. It’s more than just a decoration; it’s a functional piece of art that you’ve integrated perfectly into your home. Every glance to check the time will come with a small, satisfying reminder of the care you took.
Remember, learning how to secure a Wall Clock on a plaster wall is a skill that empowers you to truly personalize your space, no matter the age of your home. So go ahead, find that perfect timepiece, and hang it with the confidence of a pro. We’d love to see how it transforms your room.